
How to Picture Frame a Deck: Step-by-Step Instructions for a Professional Finish
In the sections ahead, we’ll walk through exactly how to picture frame a deck, from tools and materials to installing deck picture frame blocking and fastening your border boards for a professional finish.
What Does It Mean to Picture Frame a Deck?
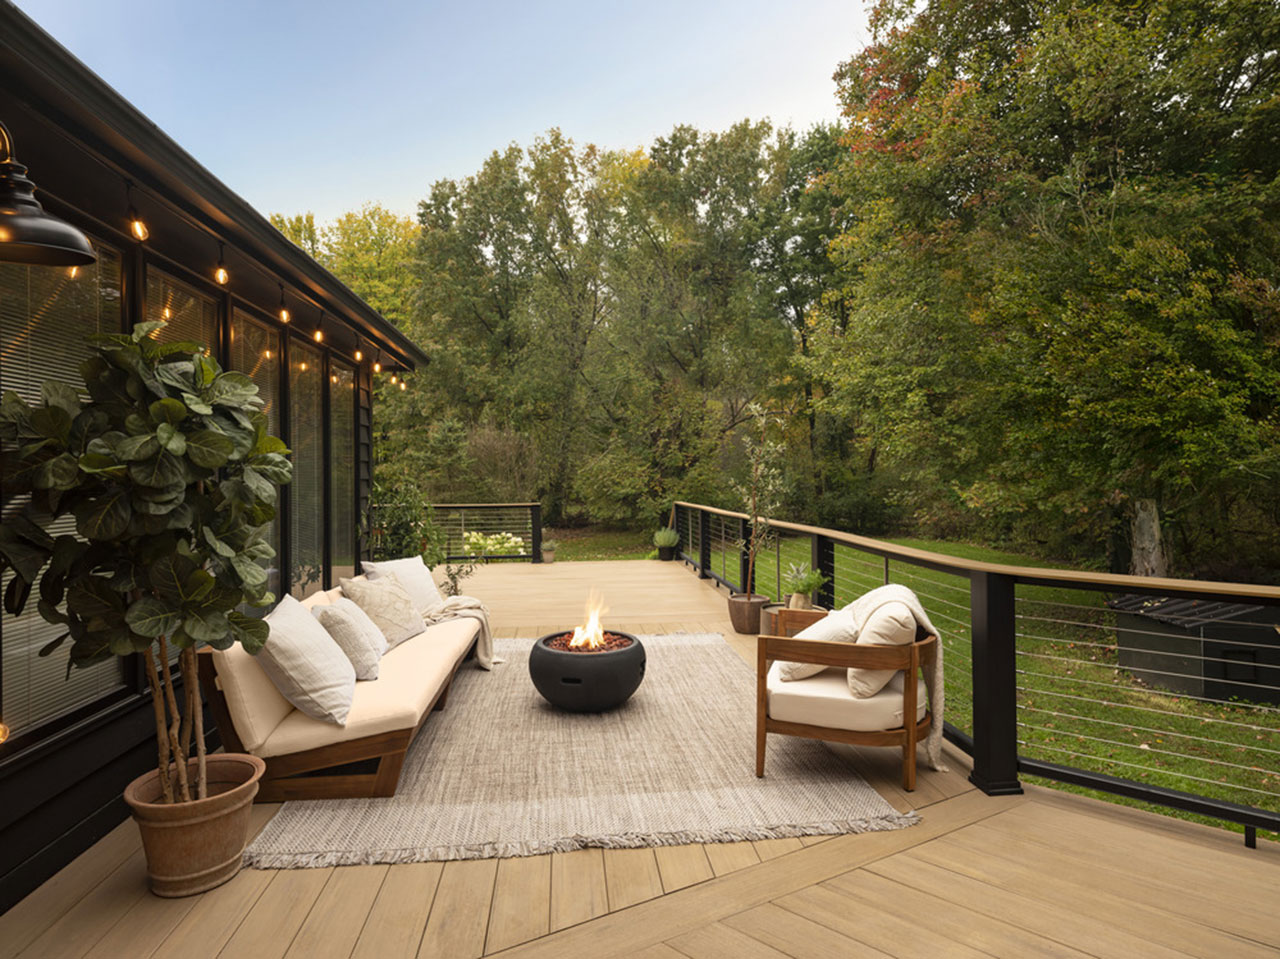
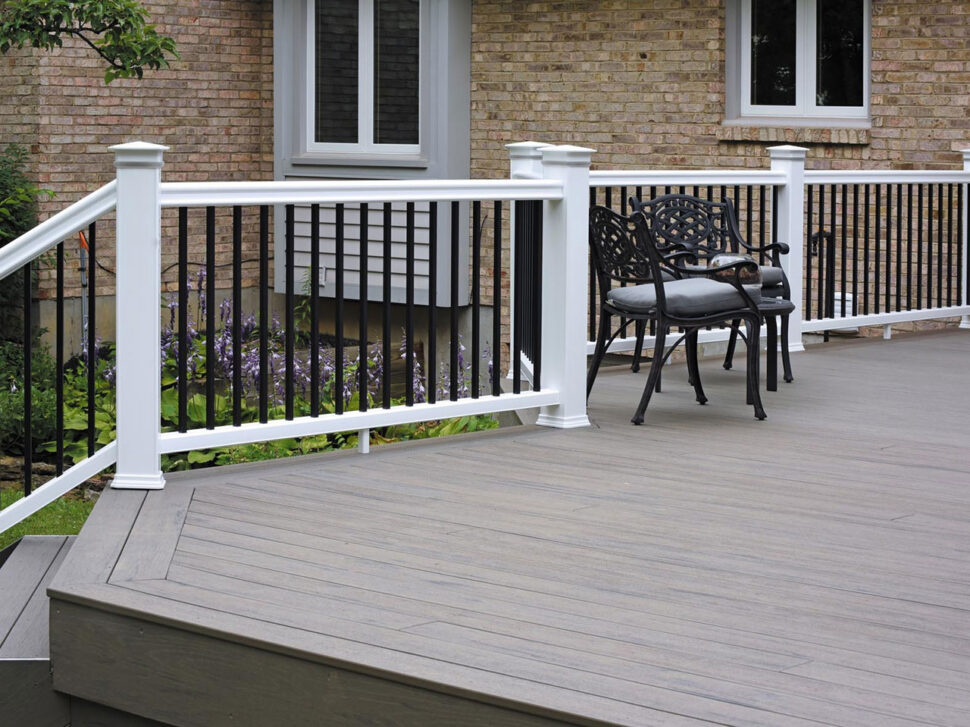
Picture framing a deck means installing a border of deck boards around the perimeter of the deck surface. The border typically runs perpendicular to the main field boards, creating a clean, defined frame around the entire deck.
This technique does more than improve appearance. By covering the exposed ends of the main deck boards, a picture frame border helps protect against moisture intrusion, impact damage, and premature wear — especially in high-traffic areas.
Why Is Deck Picture Frame Blocking Important?
Deck picture frame blocking provides structural support beneath the perimeter border boards.
Without proper blocking, issues can arise:
- Border boards can flex under foot traffic
- Mitered corners may separate over time
- Fasteners can loosen
- The perimeter may begin to sag
Proper deck picture frame blocking ensures the border boards are fully supported, securely fastened, and able to maintain their alignment long term.
Why Is Picture Framing a Deck Worth It?
Picture framing has become one of the most requested deck design upgrades among contractors and homeowners alike — and for good reason!
A picture frame border instantly elevates the look of a deck, giving it a clean, high-end finish that appears intentional and professionally built.
The visual contrast between the border and the field boards creates structure and symmetry that enhances curb appeal.
Beyond aesthetics, picture framing also improves durability. By shielding exposed board ends, the border helps reduce moisture penetration, minimize edge damage, and extend the lifespan of the decking surface.
This design is especially effective when used with premium composite or PVC decking, such as TimberTech products, which offer superior resistance to moisture, movement, and long-term wear.
What You Need Before You Start to Build a Picture-Framed Deck
Before you begin learning how to picture-frame a deck, make sure you have the right tools and materials and that the substructure is properly prepared.
Picture framing requires additional framing and precise cuts, so preparation is key to achieving a clean, professional result.
Tools Required:
Having the proper tools will make the job more efficient and ensure accurate cuts and fastening:
- Power miter saw (fine-tooth blade recommended)
- Circular saw (corded preferred for consistent power)
- Measuring tape
- Carpenter square
- Drill/driver
- Exterior-grade deck screws
- Safety glasses
For composite or PVC decking, always use manufacturer-recommended blades and fastening systems to ensure clean cuts and proper performance.
Materials Required:
In addition to your standard decking materials, picture framing requires extra framing support along the perimeter.
You’ll need the following materials:
- Deck boards (field boards + border boards)
- Pressure-treated blocking lumber (typically 2×6 or 2×8)
- Exterior-rated structural screws for blocking
- Fascia boards (optional but recommended for a finished look)
- Manufacturer-recommended fasteners for composite or PVC decking
If you’re using composite or PVC decking like TimberTech, be sure to follow their installation guidelines for spacing, gapping, and fastening requirements.
Before You Begin: Check Your Deck Frame
Before installing deck picture frame blocking or cutting border boards, confirm your framing is ready.
Make sure to:
- Ensure the framing is structurally sound and securely attached
- Confirm joist spacing (typically 16” on center maximum; 12” on center provides a more rigid feel)
- Verify the substructure is level
- Plan for railing posts (install posts first or prepare to trim boards around them)
Do not move forward until you’re confident your deck frame can properly support both the field boards and the additional perimeter framing.
Step-by-Step: How to Picture Frame a Deck
Step 1: Plan Your Layout and Border Style
Proper planning is the foundation of picture frame deck steps. Before you cut a single board, take time to finalize your layout and border design.
Decide on Your Border Style:
Picture frame decks can feature:
- A single border (most common)
- A double border for added dimension
- A triple border for a more dramatic, custom look
A single picture frame is ideal for most residential decks, while double or triple borders are often used on larger builds or commercial installations.
Determine Board Orientation:
In most cases, the field boards run perpendicular to the joists. The picture frame border boards typically run parallel to the outer rim joist, creating contrast and definition around the perimeter.
Confirm your board direction before installing blocking, since deck picture frame blocking must align with your final layout.
Plan Your Corners:
You’ll need to choose between:
- 45° mitered corners (most popular for a seamless frame look)
- Butt joints (simpler but less refined appearance)
Mitered corners require precise cutting and solid blocking beneath each corner to prevent movement over time.
Confirm Overhang Allowance:
If installing fascia, allow your border boards to overhang the rim joist by approximately ¾”. This creates a clean edge once fascia boards are attached.
Dry Fit Before Fastening:
Before permanently fastening anything:
- Lay out your border boards
- Check alignment and spacing
- Confirm corner fit
- Verify overhang
Dry fitting allows you to make adjustments before committing to cuts and fasteners.
Once your layout is finalized, you’re ready for the most important structural step: installing deck picture frame blocking.
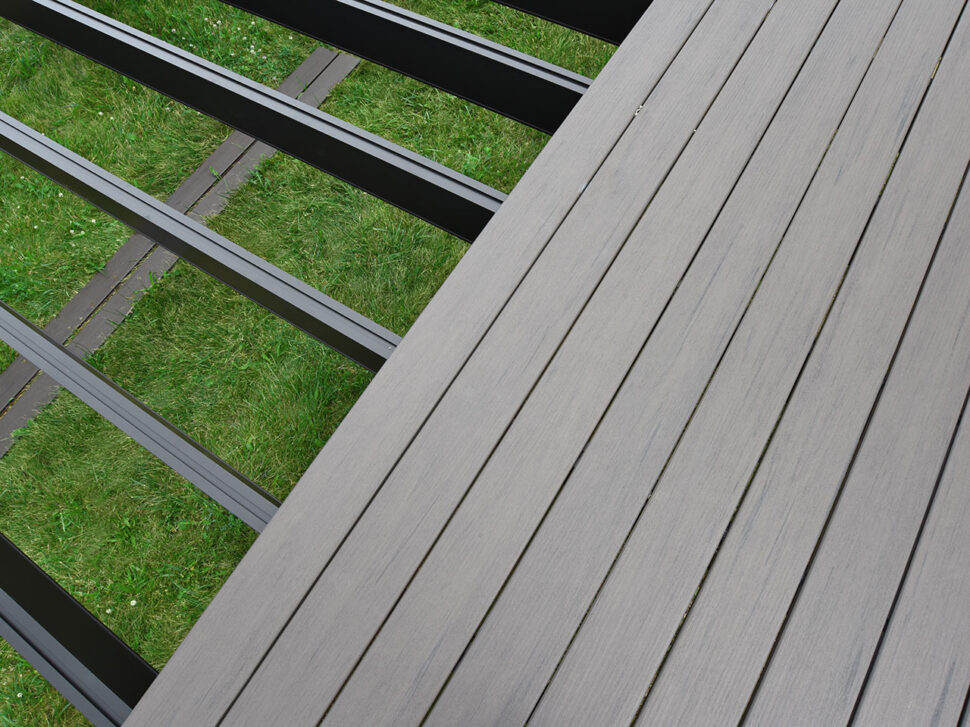
Step 2: Install Deck Picture Frame Blocking (Critical Step)
If you want to know how to picture frame a deck correctly, this is the step that makes or breaks the build.
Proper deck picture frame blocking provides your border boards with the structural support they need to stay tight, aligned, and secure over time.
How to Install Deck Picture Frame Blocking Properly:
Blocking must be installed securely, evenly, and flush with the tops of your existing joists.
Corner Blocking
Mitered corners require solid support beneath both boards.
- Install solid blocking at each corner of the deck
- Leave adequate space for proper miter alignment
- Fasten using exterior-grade structural screws
- Do not use nails, as they can loosen over time
Corner blocking prevents movement at one of the most visually noticeable points of your deck.
Edge Blocking
Run blocking along the entire perimeter where border boards will sit.
- Install blocking at a maximum of 16” on center
- For a more rigid feel, especially with composite decking, consider 12” on center
The tighter spacing provides additional stability and reduces bounce along the deck edge.
Infill Board Support
Every infill board that meets the picture frame border must be fully supported at its end.
- Ensure blocking sits directly beneath each board end
- Add double joists if additional strength is needed
Unsupported board ends are one of the most common causes of long-term deck failure.
Pro Tip:
All blocking must sit flush and in plane with the tops of your existing joists. If the blocking is uneven, your border boards will not sit flat — leading to visible inconsistencies and potential drainage issues.
Once your deck picture frame blocking is complete and secure, you’re ready to cut your border boards to size.
Step 3: Cut Your Picture Frame Deck Boards
With your deck picture frame blocking securely in place, it’s time to cut your border boards.
Precision matters here — clean cuts and tight miters are what give your deck that finished, professional appearance.
Measure Twice, Cut Once:
Before making any cuts:
- Measure each side of the deck individually
- Confirm inside and outside dimensions
- Account for overhang if installing fascia
- Double-check your 45° angle orientation before cutting
Even minor measurement errors can throw off your miter joints and create visible gaps.
Use the Proper Cutting Tools:
For best results:
- Use a power miter saw with a fine-tooth carbide-tipped blade
- Avoid cordless saws when possible, as consistent power produces cleaner cuts
- Cut boards one at a time to maintain accuracy
- Always test fit before fastening
For composite and PVC decking, follow the manufacturer’s blade recommendations to ensure smooth edges and minimize chipping.
Cutting Mitered Corners:
Most picture frame decks use 45° mitered corners.
When cutting miters:
- Confirm your saw is set to a true 45° angle
- Cut slowly and steadily to prevent tear-out
- Dry fit both pieces together before installation
- Ensure both boards are fully supported by corner blocking
Tight miters are critical for both aesthetics and long-term durability.
Account for Expansion and Contraction:
If using composite or PVC decking:
- Follow manufacturer-specific expansion gap requirements
- Adjust spacing based on temperature during installation
- Leave proper clearance at butt joints as recommended
Ignoring expansion guidelines can cause buckling or separation later.
Once your picture frame boards are cut, dry-fitted, and aligned, you’re ready to secure them in place.
Step 4: Fasten Your Picture Frame Border Boards
With your border boards cut and test-fitted, it’s time to secure them in place. Proper fastening ensures your picture frame remains tight, aligned, and structurally sound for years to come.
Fastening Tips for a Clean Finish:
To achieve a professional result:
- Allow border boards to overhang the rim joist by approximately ¾” if you plan to install fascia
- Make sure the miters are tight before driving any fasteners
- Fasten within ½”–¾” from the board edge (follow manufacturer recommendations)
- Use recommended color-matched fasteners for composite or PVC decking
Always fasten evenly along both sides of a miter joint to prevent separation over time.
Fastening Composite and PVC Decking:
If you’re using composite or PVC decking:
- Follow the manufacturer’s installation guide for screw spacing
- Pre-drill if required (varies by product line)
- Consider hidden fastening systems for infill boards to maintain a clean surface
Proper fastening not only improves appearance but also helps prevent movement caused by expansion and contraction, as well as by foot traffic.
Work Methodically Around the Perimeter:
Start at one corner and work your way around the deck:
- Secure one side fully before moving to the next.
- Recheck alignment at each corner.
- Confirm that border boards sit flush and level across the entire perimeter.
Taking your time during this step ensures the frame stays straight and symmetrical.
Once the border is securely fastened, your deck will begin to take on that polished, framed appearance. Now it’s time to complete the interior surface.
Step 5: Install and Fasten the Infill Deck Boards
With the picture frame border secured, you can now install the infill deck boards inside the frame. This is where the overall look of your deck comes together, so consistency and spacing are key.
Measure the Inside Dimension:
Before cutting your infill boards:
- Measure the distance between the inside edges of the picture frame border
- Measure at multiple points to confirm consistency
- Cut boards to fit precisely within the frame
Proper measurement ensures tight alignment and prevents gaps or uneven spacing.
Follow Proper Gapping Guidelines:
If you’re using PVC decking:
- Keep board ends tight to the picture frame border unless otherwise specified
If you’re using composite decking like TimberTech:
- Follow the manufacturer’s butt-joint gapping requirements
- Adjust spacing based on temperature at the time of installation
Correct gapping allows for natural expansion and contraction and prevents long-term issues.
Fasten Securely at Each Joist:
For a secure installation:
- Fasten two screws per joist at the ends of each board
- Keep fasteners evenly spaced
- Maintain consistent board spacing across the entire deck surface
If using hidden fastener systems, follow product-specific instructions to ensure boards remain tight and aligned.
Maintain Straight Lines:
As you install infill boards:
- Periodically check for straightness
- Use a string line if needed
- Make minor adjustments early before fastening fully
A properly aligned infill section enhances the crisp, framed look of the border.
Step 6: Finishing Touches & Long-Term Protection
With your border and infill boards installed, your picture frame deck is nearly complete. The final step is ensuring everything looks polished and is built to last.
Install Fascia Boards (If Desired):
Fascia boards create a clean, finished appearance along the outer rim of the deck.
- Attach fascia boards flush beneath the picture frame overhang
- Secure with recommended exterior fasteners
- Confirm alignment along the entire perimeter
Fascia helps conceal framing members and enhances the professional look of your deck.
Check for Flush Edges and Tight Miters:
Walk the perimeter and inspect:
- Miter joints for tight alignment
- Border boards for level installation
- Even overhang along all sides
Address minor adjustments before declaring the project complete.
Clean and Inspect:
Before final use:
- Remove debris and sawdust
- Wipe down the surface
- Confirm all fasteners are fully seated
If using composite or PVC decking, use manufacturer-approved cleaning products to maintain surface integrity.
Perform Annual Inspections:
To prolong the life of your deck:
- Inspect miter joints annually for movement
- Check fasteners for loosening
- Keep the surface clean and free of debris
Routine inspection ensures your deck picture frame blocking and fastening system continues performing as intended.
With the build complete, let’s cover common mistakes to avoid when picture framing a deck.

Common Mistakes to Avoid When Picture Framing a Deck
Even experienced builders can run into issues when learning to picture-frame a deck. Most long-term problems stem from oversights during framing or installation.
Here are the most common mistakes to avoid:
1. Skipping Deck Picture Frame Blocking
Skipping blocking is the most frequent (and costly) mistake.
Without proper deck picture frame blocking:
- Border boards lack full support
- Miters can separate
- Edges may flex under foot traffic
- Sagging can develop over time
Blocking is not optional — it’s essential for structural integrity.
2. Using Nails Instead of Structural Screws
Blocking and border boards should always be secured with exterior-grade structural screws.
Nails can loosen as lumber expands and contracts, leading to movement and instability along the perimeter.
3. Failing to Support Infill Board Ends
Every infill board that meets the picture frame must be fully supported underneath.
Unsupported ends are prone to:
- Bouncing
- Cracking
- Fastener pull-out
Double joists or additional blocking may be required to provide adequate support.
4. Ignoring Expansion Gaps (Composite Decking)
Composite and PVC decking expand and contract with temperature changes.
When installing products like TimberTech:
- Follow manufacturer-specific gapping requirements
- Adjust spacing based on installation temperature
- Never force boards tightly together without checking guidelines
Improper spacing can cause buckling or separation later.
5. Cutting Multiple Boards at Once Without Test Fitting
While it may seem efficient, cutting several border boards at once increases the risk of misaligned miters.
Instead:
- Cut one board at a time
- Test fit before fastening
- Make small adjustments as needed
Precision at this stage ensures a tight, professional-looking frame.
Avoiding these mistakes will help ensure your picture frame deck remains structurally sound and visually sharp for years to come.

Why Pros Choose TimberTech for Picture Frame Decks
When it comes to picture framing, the choice of material matters.
Many contractors prefer TimberTech for picture frame decks because the product’s performance supports both aesthetics and durability.
Here’s why:
- Advanced PVC and capped composite options for different project needs
- Superior moisture resistance, reducing long-term swelling and damage
- Reduced warping and splintering compared to traditional wood
- Clean, precise miter edges for a crisp border appearance
- Long-term color retention
- Strong product warranties
PVC and composite decking are especially well-suited for picture frame designs because they resist the end-grain swelling common with pressure-treated lumber. That stability helps maintain tight miter joints and straight border lines over time.
For contractors and homeowners who want a professional finish that lasts, TimberTech decking offers both performance and design flexibility.
FAQs: How To Picture Frame a Deck
How do you picture frame a deck?
To picture frame a deck, install additional blocking along the deck perimeter, cut border boards to size (typically with 45° mitered corners), fasten the border boards first, and then install the infill boards inside the frame.
Do you need blocking for a picture frame deck?
Yes. Deck picture frame blocking is required to support the perimeter boards and prevent sagging, flexing, or fastener failure. Without proper blocking, the border boards may shift or separate at the miters.
What spacing is recommended for deck picture frame blocking?
Blocking should be installed at a maximum of 16 inches on center. For a more rigid feel (especially when installing composite or PVC decking), many professionals prefer a 12-inch-on-center spacing.
Can you picture frame a deck with composite boards?
Yes. Composite and PVC decking, such as TimberTech products, are commonly used for picture-frame designs. These materials provide excellent durability, moisture resistance, and long-term performance.
Build It Right the First Time With Standard Supply & Lumber
Whether you’re a contractor building for a client or a homeowner upgrading your backyard, the right materials and expert guidance make all the difference.
Ready to get started? Visit Standard Supply & Lumber for decking materials, blocking lumber, fasteners, and TimberTech decking solutions to build your picture frame deck with confidence.